Marty McFly's Advanced Depth of Field (standalone)
- Marty McFly
- Topic Author
Why another DoF, you may ask:
Well, first of all, it is very scalable and allows small blur at little fps cost up to screenarchery blur at a performance that could only be achieved by separable filters like Magic DoF. The focussing works a little different to the one in MasterEffect/McFX but you'll see, it allows much more control of the blur than any other one!
Most noteable features are
- Extreme quality:
Shaders like gp65cj042 DoF have a quality modifier that controls how many "rings" the DoF blur draws. Usually, after 12 or more rings, internal limits are reached and performance is unbearable. This shader can (virtually) draw up to 255 rings without compiler errors. Of course values like these kill the framerate but even a quality setting of 20 runs comparably fast. - Extreme performance:
If you want little farblur and other DoF shaders are too heavy for that (after all they are developed for heavy blur), this is the right thing for you. The sheer amount of features might be baffling but the shader is also optimized to produce lightweight results. On the other hand, if you want to make elaborate screenshots with huge out of focus blur that covers large areas of the screen, this is the one for you. While other solutions struggle to produce such results at all, this shader here runs comparably fast. I could be naming some abstract impact in ms/frame but that never beats personal experience, does it. - Extreme scalability:
You can modify your blur shape in almost any way you can imagine! This DoF features rotation, curvature (for circular DoF), aperture deformation, anamorphic ratio, lens distortion, shape diffusion (to roughen up the shape and get rid of moire patterns), weighting, different chromatic aberration modes. If that's not enough, you can customize your shape by using a texture mask.
Complete documentation of control values
Focussing
AutofocusEnable
Pretty straightforward - enables automated focal depth detection using a defined pattern of sampling positions onscreen to find out what is in focus. If disabled, ManualfocusDepth is used.
AutofocusCenter
X and Y coords of the sampling pattern that determines focal depth. 0|0 is top left corner of screen.
AutofocusSamples
How many samples are taken into account for automated focal depth detection. Higher values can produce more accurate focal depth detection.
AutofocusRadius
Controls how far the samples are away from the AutofocusCenter. Higher values result in better detection of scene but problematic when you want to focus on a small object.
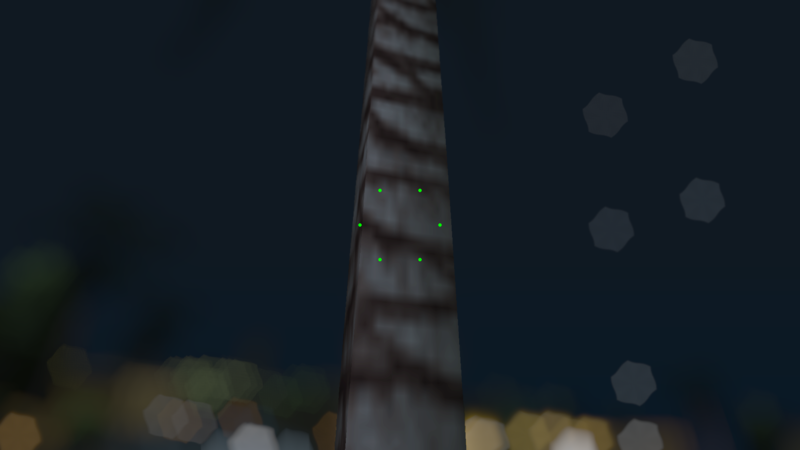
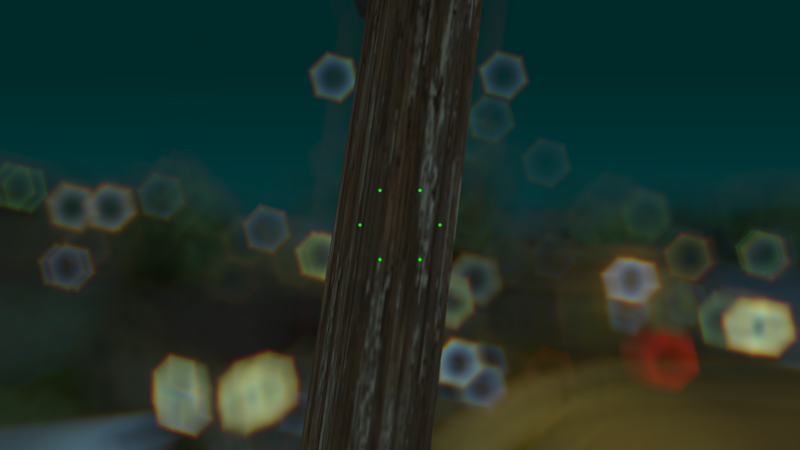
AutofocusVisualizeEnable
Makes the autofocus sampling points visible. Their color indicates their returned focal depth. Green means focal depth around 0, red means almost maximal focus distance.
NearBlurCurve, FarBlurCurve
Both values control the blur curve of areas closer to camera than focal depth ( NearBlurCurve ) or behind it ( FarBlurCurve ).
ManualfocusDepth
If AutofocusEnable is set to 0, this fixed value is used for focal depth. 0.0 means camera itself, 1.0 means infinite distance.
InfiniteFocus
Usually, depth starts at 0.0 and increases linearly to 1.0. This may be problematic if you only want out of focus blur when objects are very close to the camera. If you set this parameter to 0.3 for example, DoF depth starts at 0.0 and reaches 1.0 at depth=0.3 so anything with a depth > 0.3 is considered as infinitely far away. In practice this means that lower values need a very close focal depth to produce blur at all. So if you want to simulate DoF like in GTA V, set this value to around 0.04. That way, blur only kicks in when you have something right in front of the camera.
Shape
RenderResMult
This effectively reduces the number of pixels processed, giving you a bit of extra blur and smoothing and reducing the performance overhead by far. Don't set too low though or you get aliasing artifacts. A value of 0.707 cuts the number of processed pixels in half while maintaining good quality.
ShapeRadius
Maximal blur radius in pixels. Higher values require higher ShapeQuality Or the single blur offsets become visible.
ShapeQuality
How many "rings" are drawn to produce blur shape. For other solutions, performance drop and compilation time goes up exponentially. gp65cj042 maximum for this is 8-9 while this here can be set to 255 - virtually. Higher means better shape but also less performance. It's advised to not set it higher than 15 for gameplay an not higher than 30 for screenshots. Find a good balance.
ShapeVertices
How many vertices the bokeh shape has. 4 vertices produce a square, 5 a pentagon and so on.
ShapeTextureEnable
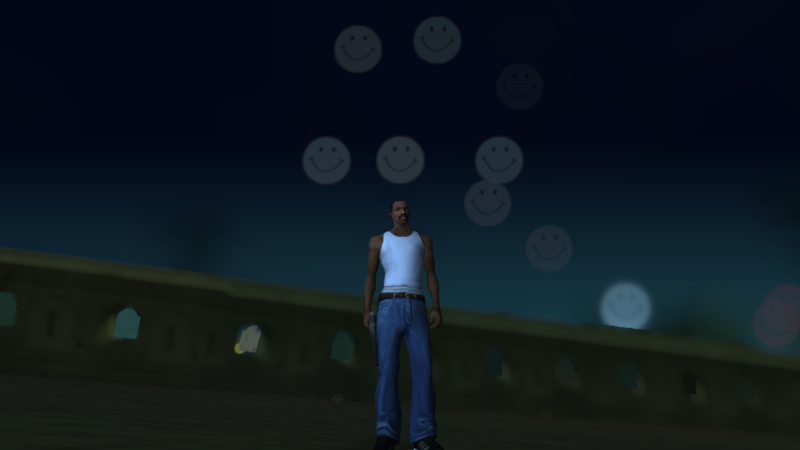
Enables shape masking (see external texture) if you want completely custom shapes (like a heart, a number, an emoticon...). Drops performance though.
ShapeTextureSize
Side length of square mask texture in pixels. It's better to use a texture with an uneven pixel side length because one like 32x32 has no center pixels but the bokeh shape has a center. Using uneven side length texture makes the texture pixels and bokeh blur offsets match way better. Higher texture size also means less performance so find a good balance.
Shape modifications
ShapeRotation
Bokeh shape rotation in degrees
RotAnimationEnable
Enables rotation of bokeh shape in time. RotAnimationSpeed controls the direction and speed of the rotation.
ShapeCurvatureEnable
Enables deformation of bokeh shape to circular shape. It's better to use a higher ShapeVertices number for that otherwise moire patterns may appear.
ShapeCurvatureAmount
How much the shape sides are bent outwards. 1.0 means circular shape, something in between makes the polygonal shape look as if it ate too much donuts. Negative values to produce star-like shapes.
ShapeApertureEnable
Enables swirl like effect to simulate aperture shape. See screenshots section for more info. ShapeApertureAmount Controls direction and amount of effect.
ShapeAnamorphEnable
If enabled, lowers the horizontal dimension of the bokeh shape to simulate anamorphosis effect which is caused by anamorph lenses and used in many movies. The same effect or better these lenses also causes the characteristic light streaks called anamorphic lens flares. ShapeAnamorphRatio controls the ratio of height and width of bokeh shape. 0.0 means vertical line, 1.0 means original ratio.
ShapeDistortEnable
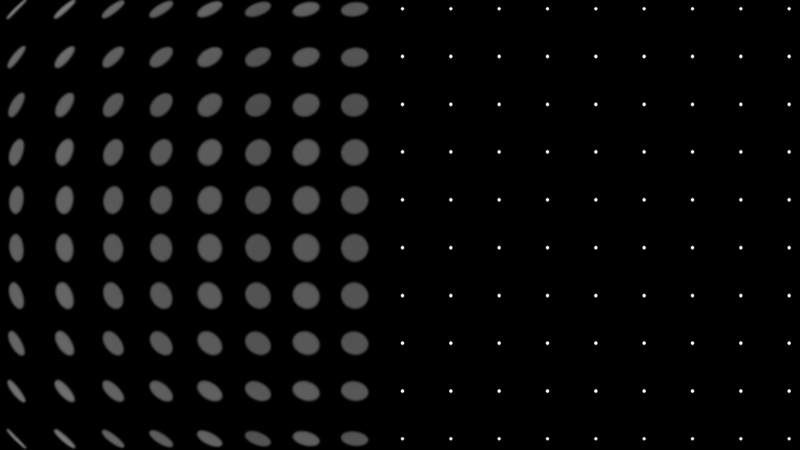
Enables shape distortion to simulate lens distortion without moving screen parts around. ShapeDistortAmount controls the distortion amount.
ShapeDiffusionEnable
This feature scatters the single offsets a bit around to roughen up the shape and lower moire patterns caused by regular alignment of offsets. Don't worry, for low values the noise won't be visible as such. Although if you set ShapeDiffusionAmount too high, you end up with an effect that looks like the explosion shader of SweetFX.
ShapeWeightEnable
Enables donut-like effect (thanks kingeric for this neat comparison) by lessening the bokeh intensity at the shape center. ShapeWeightCurve and ShapeWeightAmount control the falloff of this effect.
BokehCurve
Works just like the bokeh curve of magic DoF and helps creating this "bokeh" effect by making bright spots stand out more without creating overbright spots like naive approach.
Chromatic Aberration
ShapeChromaEnable
Enables shape chromatic aberration (colored border on bokeh shapes). This is calculated per tap only so it triples the effective sampling amount but profits of texture caching so I decided to not use shape chroma in post blur. ShapeChromaAmount Controls the amount of chromatic aberration.
ShapeChromaMode
As using more than 3 offsets is too expensive performance-wise, I decided to only split up R G and B channels. This value cycles though the different possible offsets.
ImageChromaEnable
Enables image-based chromatic aberration, same shader as used in YACA, only it's linked to blur radius. Other control values work same.
Other
SmootheningAmount
Enables a post blur (not exactly gaussian or linear) to smoothen the bokeh shape more at almost no fps cost so I decided to not make it optional.
ImageGrainEnable
Enables my own approach in image grain that is actually embossed grain. Linked to focussing so areas in focus receive no grain.
ImageGrainCurve
Governs distribution of grain. Higher values only produce noise at high DoF blr radii, while lower values than 1.0 produce grain even at little blur.
ImageGrainAmount
Linearly increases image grain amount.
ImageGrainScale
Scales the grain source texture. Higher values produce more coarse grain.
Example screenshots
Aperture and focus visualization
Shape chroma, bokeh weighting and focus visualization
Shape texture:
Lens distortion:
Download
mediafire.com
Whoever finds optimizations can keep them (I'm looking at you kingeric ) I have neither time nor interest anymore to work on this shader but I also dislike people meddling with it. There may be small improvements that can further improve performance but the overall structure provides striking performance already so these changes will be minor. Plus, 99% of a DoF shader's performance overhead are the huge amount of samples anyways. Of course, bugfixes will be made. If you want to use parts of this code in other projects, please ask me first.
Short note about external textures: bokehmask is new, while the noise texture is identical to MasterEffect/McFX one.
Please Log in or Create an account to join the conversation.
- Quentin-Tarantino
Please Log in or Create an account to join the conversation.
- OtisInf
Quick question (because it's one of the main reasons I don't like the current DoF in reshade): (If it's already there and thus I overlooked it: forget I asked) could you add a parameter which defines the focus range? So in effect a near and far plan after which the blurring kicks in. This is IMHO easier to configure than a blur curve and more natural with what a human experiences elsewhere: if the range around the focused point (nearer towards the camera and further away from the camera) is configurable, it's easier to control what is out of focus. At least that's what's my experience with other DoF's, including Kingeric1992's one for ENB.
TIA.
Please Log in or Create an account to join the conversation.
- mindu

I have a question how can I use logarithmic depth? or any other way for V?
Please Log in or Create an account to join the conversation.
- Marty McFly
- Topic Author
Problematic because it does not fit the render chain I set up for the DoF's. Either I migrate all DoF's to this focussing and masking and break all existing configs in the process or I set up a separate chain which is what I wanted to prevent when I unified the DoF shaders in the first place.
OtisInf
Focussing will stay that way.
mindu
Currently no option for logarithmic depth yet, as I have no game right now to test this on (I have GTA 5 but installation is broken and 60 gb, well...).
Please Log in or Create an account to join the conversation.
- kingeric1992
Please Log in or Create an account to join the conversation.
- OtisInf
Bummer, but okMarty McFly wrote: OtisInf
Focussing will stay that way.
You could use the linearized depth buffer which works with either logarithmic depth buffers or normal ones? (haven't checked whether you're using that already, haven't looked at the code yet)mindu
Currently no option for logarithmic depth yet, as I have no game right now to test this on (I have GTA 5 but installation is broken and 60 gb, well...).
Please Log in or Create an account to join the conversation.
- Marty McFly
- Topic Author
Please Log in or Create an account to join the conversation.
- mindu
depth = saturate(1.0f - depth);
depth = (exp(pow(depth, 150 * pow(depth, 55) + 32.75f / pow(depth, 5) - 1850f * (pow((1 - depth), 2)))) - 1) / (exp(depth) - 1); // Made by LuciferHawk ;-)edit: also tried to invert near/far depth like I did with old ME to make it work without logdepth but with this dof doesn't work that way either
Please Log in or Create an account to join the conversation.
- Marty McFly
- Topic Author
Please Log in or Create an account to join the conversation.
- OtisInf
Please Log in or Create an account to join the conversation.
- mindu
it works!! its beautiful thanksMarty McFly wrote: Find the GetLinearDepth function and paste the new code there.
Please Log in or Create an account to join the conversation.
- Ganossa
I included the ADOF code and it works like a charm in GTA V e.g.
Please Log in or Create an account to join the conversation.
- Marty McFly
- Topic Author
Please Log in or Create an account to join the conversation.
- NattyDread
I guess it would be ideal if we could set the pure black (furthest point) and pure white (closest point) our selves on a per game basis so we can use the DB to it's full potential.
Please Log in or Create an account to join the conversation.
- Ganossa
@NattyDray, as far as I remember, AO shader might not use the global depth linearization functions in your release yet. I think I tried it though when integrating Marty's new version into the framework. However, I am rather unsure/unfamiliar when it comes to the AO code so I am sure Marty needs to check first whether everything works as intended (plus I think he has even a later version already
Anyhow, I will remember to add flip options for that global linearization fuctions and leave some information how you can do that yourself shortly
Please Log in or Create an account to join the conversation.
- Kleio420
//admin edit: don't quote huge posts, a simple @username is enough.
Please Log in or Create an account to join the conversation.
- Marty McFly
- Topic Author
Please Log in or Create an account to join the conversation.
- OtisInf
It depends on whether the Z axis is positive (D3D) or negative (OpenGL) into camera space, I think. Max depth against camera location (so camera space) should IMHO always positive (as that's more natural, as max depth==highest depth value so furthest away from the origin, which is the camera), but in the coordinate system of the rendering api might mean it should be negative and that could lead to e.g. lower values for max depth.NattyDread wrote: Inverted DB is fine for DoF but it's horrible for AO. Can you guys PLEASE do something about this. Most of the log depth ones are inverted.
I guess it would be ideal if we could set the pure black (furthest point) and pure white (closest point) our selves on a per game basis so we can use the DB to it's full potential.
For a generic shader that has to work on opengl and d3d, I think you can only linearize in one way: depth in camera space with positive Z into the camera space, so max depth is positive and a higher value than min depth. The shaders then can anticipate on that being always the case and there's just 1 location to take care of linearization instead of in each shader.
Please Log in or Create an account to join the conversation.
- kingeric1992
OtisInf wrote: It depends on whether the Z axis is positive (D3D) or negative (OpenGL) into camera space
This is not true, opengl is also positive into screen depth, it is just ranged [-1,1].
However in d3d, there is a trick using inverted/reversed depth buffer (ie, map far clip plane to 0 and near to 1) to distribute float precision more evenly.
gl, on the other hand, can not be benefit from such trick.
here is a detail info and visualization on reversed-z developer.nvidia.com/content/depth-precision-visualized
a example of reversed-z is Mad Max, with the linearization function:
zF = 40000;
zN = 0.1;
    lineardepth = zF * zN / (zN + depth * (zF - zN));
I think the macro _RENDER_ is used to tell the shader what api it is using, so there shouldn't be any problem converting gl depth buffer to directx range.
Please Log in or Create an account to join the conversation.
